This work is licensed under a Creative Commons Attribution-ShareAlike 4.0 International License.
About
Last Updated [10/28/2019]
Created by OSU Maps and Spatial Data
Table of Contents
- Introduction
-
- Basic Setup
-
- Folder Structure
-
- Creating Presentation Content
-
- Adding Style
-
- Export as PDF
- Conclusion
- Further Reading/Resources
Introduction
reveal.js is a wonderful way to create sleek and unique presentations using HTML. There are many features available to add flare to your presentation and wow your audience. In this guide, I will walk you through the basic steps needed to create your own presentation.
Basic Setup
The basic setup allows you to author your very own presentations only. There is a full setup, but we’ll go over this in another guide.
- To get started, you need to download the lastest version of reveal.js from this website.
- Unzip and replace the contents in index.html with your own presentation content.
- Use a browser to open and view your presentation.
Folder Structure
There are a few different folders to store separate elements
- css/ Core stules that make the project function correctly
- js/ Similar to CSS but for JavaScript
- plugin/ Stores components that were developed as extensions to reveal.js
- lib/ Any other third party asset (JavaScript, CSS, etc.)
Creating Presentation Content
I, personally, prefer to create my presentation content before I get too mixed up in the style and appearance of the presentation. However, this is not the only way to create a reveal.js presentation.
- First, we need to begin with our presentation’s skeleton.
```<html>
</html>
The order of the presentation markup must be *.reveal > .slides > section*. Each *section* represents a different slide.

2. Let's create a title page. For my presentation, I will be talking about hedgehogs, so this is the code for my very first slide.
Hedgehogs:
The World's Cutest Animal
By: Addison Van Zandbergen
3. Continue to add sections as desired.

#### Adding Style
- ***Verticle Slides***
Creating verticle slides is an easy way to spice up your presentation and allows you to sort your presentations into different sections.
1. To create verticle slides, you will simply add sections within a section. These nested sections will serve as verticle slides.
Famous Hedgehogs
Count Hogula

The God Hogger

El Hogo

Hoggalo Bill

Hogiel

Santa Hog

Hoggy Flay

2. The flow of nested/verticle sections will be different based on the navigation techniques you use. We will go over these in the next section.
- Navigation
There are different ways to navigate through your presentation. I will touch on a few of these here.

**Spacebar**
The simplest way to navigate through your presentation is to simply hit the *spacebar* every time you wish to change slides. This includes verticle slides as well. Take a look at the diagram above. By using *spacebar*, your presentatio will go directly from *Slide 2* to *Slide 2A* and, later, from *Slide 2B* to *Slide 3*.
**Arrow Keys**
Using the *arrow keys* is also a simple way to navigate through your slides, but be careful when including verticle slides. To navigate from one slide to the next, simply use *→*. If you have verticle slides though, you must use *↓* to navigate through them. If you use *→*, the verticle slides will be skipped. As seen in the diagram, using *→* will jump from *Slide 2* to *Slide 3*, but *↓* will jump from *Slide 2* to *Slide 2A*. You must also use *→* to jump from *Slide 2B* to *Slide 3*. If by mistake you skip a slide, you can use *←* to navigate through regular slides or *↑* to navigate backwards through verticle slides.
*Note: There are ways to override this, but we will go over that in a more advanced reveal.js guide. (See link at the bottom of the page.)*
**Auto-sliding**
You can configure auto-sliding to avoid manual navigation altogether. There are two different ways to achieve this. If you want automatic navigation through the whole presentation, you can add this code to your configuration settings.
If you would rather only auto-slide through a portion of your presentation, you can enter a simple line of code to that section.
// Slide every 3 seconds through this section only <section data-autoslide=”3000”; > <section> <h1>Famous Hedgehogs</h1> </section> </section>
- ***Transitions***

Transitions are a great way to add flare to your presentation and they are simple to add! You can choose from ```concave``` ```convex``` ```fade``` ```slide``` ```zoom``` and ```none```. To add a transition, just add a little bit of code to each section, like we did with auto-slide.
Adaptation
To protect themselves from predators, hedgehogs have sharp spines and...
You can also add different transitions for transitioning into and out of a slide.
Reproduction
Hedgehogs are solitary animals and on couple for mating purposes...
Feel free to try these out and find a combination that works best for you!
- ***Fragments***

Fragments can be used to make individual elements pop! Just like slide transitions, you can add multiple fragment styles to each element.
Hi!
I'm a hedgehog.
I am very shy,
but I like to make friends.
Will you be my friend?
We can take naps,
or eat tasty snacks!
I love to eat apples,
or veggies
and drink lots of water!
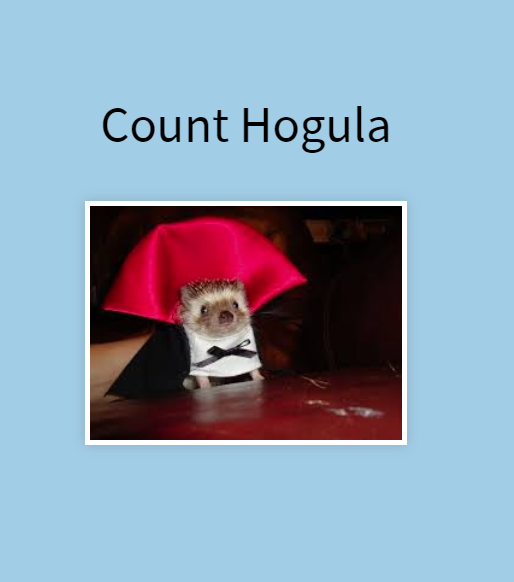
- ***Adding Pictures***

Adding pictures in reveal.js is easy. All you need to do is add a simple line of code with a link to the picture you wish to include.
Count Hogula


- ***Themes***
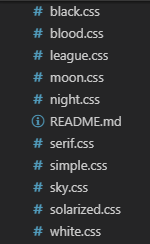
You can change the appearance of your presentation by using different *themes*. The files you downloaded at the beginning of this guide include some preset themes. If none of these are to your liking, though, you can create your own by altering the style settings within one of these files and saving it as a new, personal theme.
To change the theme, change this line of code in the *<head>* section:
*Example:*
```
<link rel="stylesheet" href="css/theme/league.css">
```

#### Export as PDF
Your presentations can be exported as PDFs to share with others or save for yourself. The only downside is that you must use Google Chrome or Chromium and have to be serving the presentation from a web server. Other than that, it's just a few simple steps!
1. To do this, you will need to include a few lines of code in your *script* tag. If you used the template in the first section, this should already be there.
link.href = window.location.search.match( /print-pdf/gi ) ? ‘css/print/pdf.css’ : ‘css/print/paper.css’; document.getElementsByTagName( ‘head’ )[0].appendChild( link ); ```
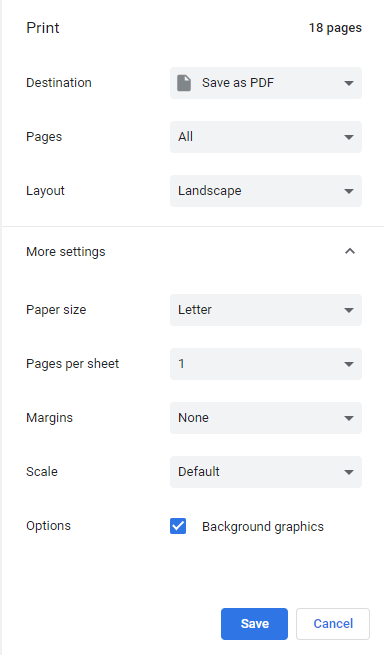
- Open the print dialog box in your browser.
- Change the Destination to Save as PDF.
- Change Layout to Landscape.
- Change Margins to None.
- Enable the Background graphics option.
- Click Save.
Conclusion
Make your presentations a step above the rest with reveal.js!
Further Reading/Resources
For more information, or to learn about features not discussed here, please see this guide.
