This work is licensed under a Creative Commons Attribution-ShareAlike 4.0 International License.
About
Last Updated [07/03/2019]
Created by OSU Maps and Spatial Data
Table of Contents
- Introduction
- [Mosaic Datasets]
-
- Photoshop
-
- Creating a Mosaic Dataset
-
- Building Overviews
-
- Color Balancing
-
- Seamlines
-
- Tile Generation
-
- Publishing
- Conclusion
- Further Reading/Resources
Introduction
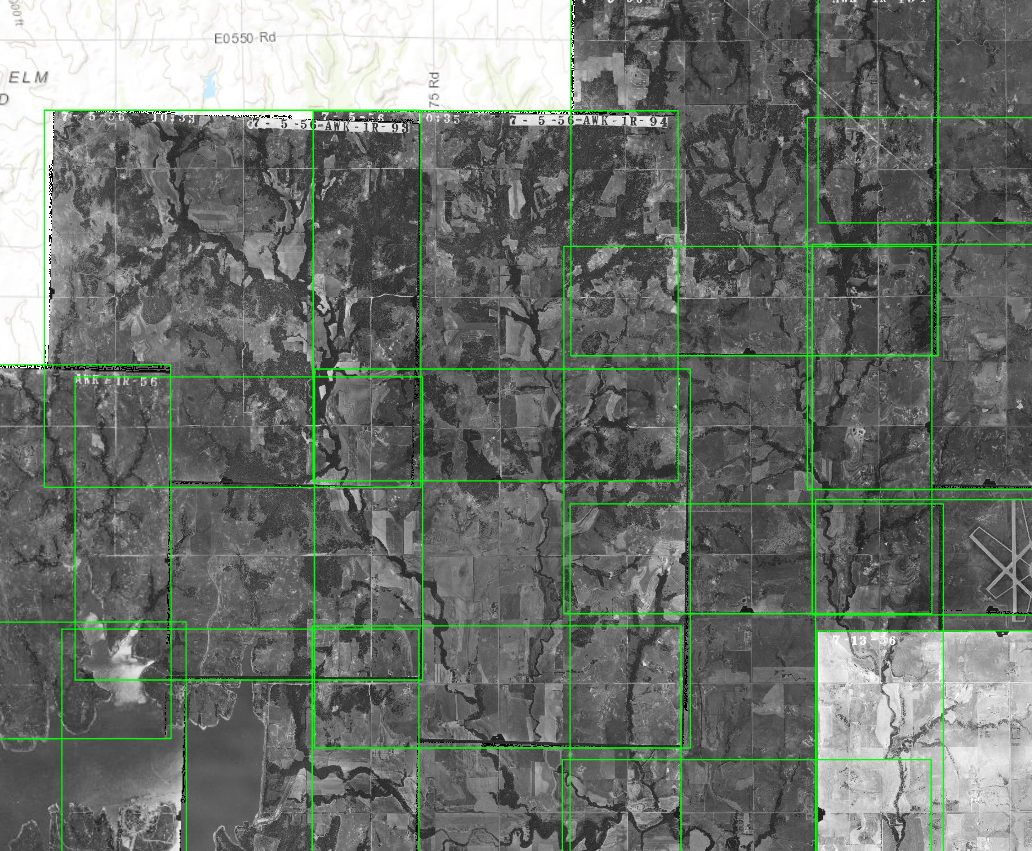
Mosaic datasets allow you to easily work with large collections of raster and image data. These datasets can be created in ArcGIS Pro to make data management simple.
[Mosaic Datasets]
Photoshop
When working with black and white images, it is important to make sure they are all in Grayscale. If they are not, this can be changed. We will start with one image to create an action and use this action to complete the rest.
- Open photoshop and add one of the images you are using for the mosaic.
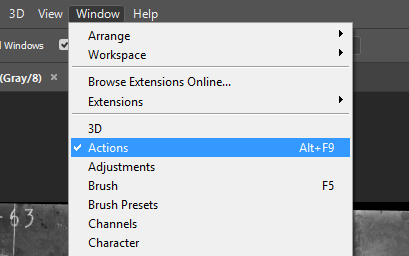
- Select the Windows tab on the toolbar and click Actions.
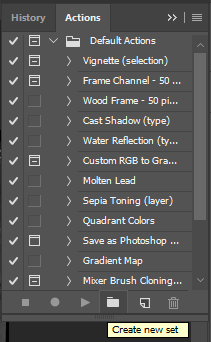
- A pop up should appear. Select the folder icon to Create new set.
- Name the set and click OK.
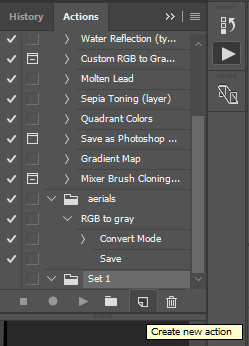
- Create a new action by clicking the Create new action icon in the Actions pane.
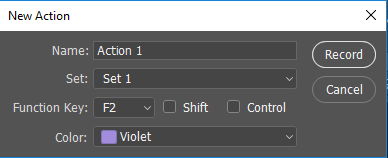
- Name the action, put it in the set that was just created and choose a function key and color if desired. Click record.
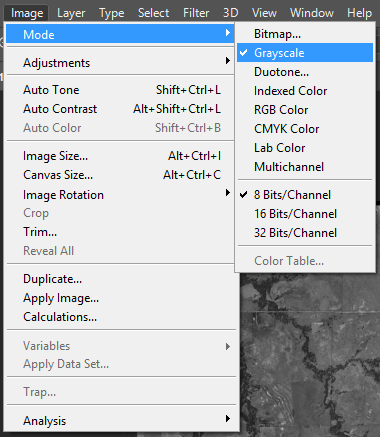
- Click the Image tab, hover over Mode and choose Grayscale.
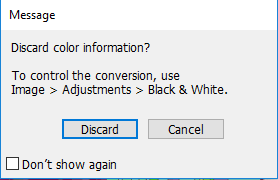
- A message should pop up. Click Discard.
- Save the image and click Stop playing/recording in the Actions pane.
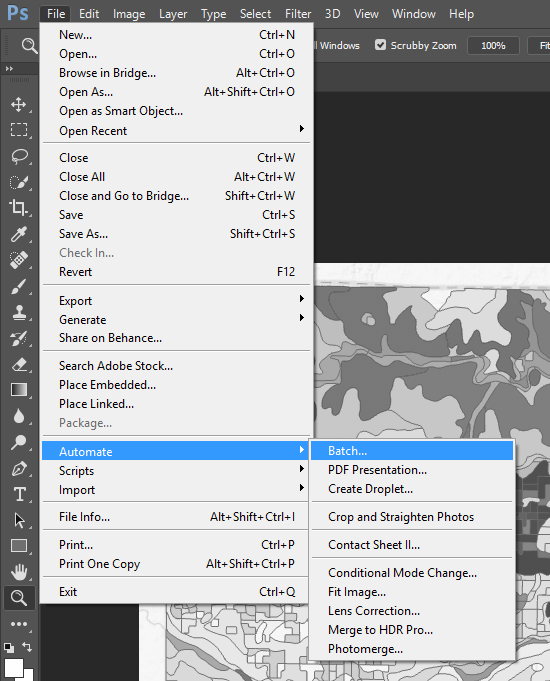
- To use this newly created action on the remaining files, select the File tab, choose Automate and Batch.
-
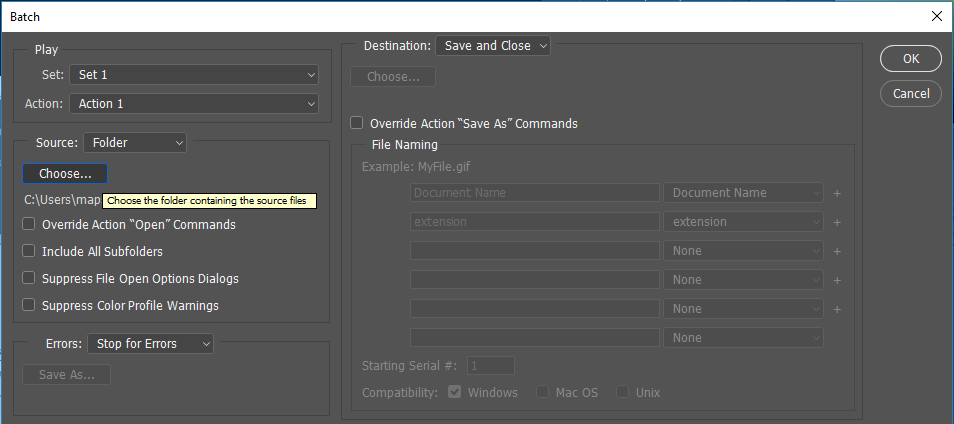
In the new pane, select the desired folder or files and click OK. It should toggle through the files and convert them into Grayscale images.
-
Close Photoshop when finished.
Creating a Mosaic Dataset
- Start a new project in ArcPro and set the file location as the file containing the already georeferenced images you wish to use for the mosaic dataset.
- Add a folder connection to this file in the Catalog pane.
- Select the files you wish to use and add them to the project.
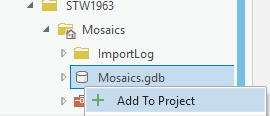
- Right click on the geodatabase and click Add to project.
- In the Contents pane, remove the images. They are now synchronized with the geodatabase.
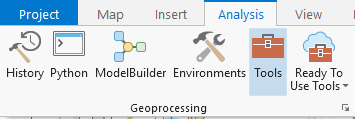
- Click the Analysis tab on the toolbar and select Tools.
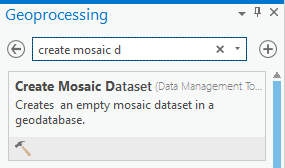
- Search for and select Create Mosaic Dataset in the new Geoprocessing pane.
- Set the output location as the project’s geodatabase, give it a name, set the coordinate system to that of the current map and ensure Product Definition is set to None. Then click Run.
- In the Catalog pane, you should find the mosaic dataset by expanding the geodatabase. Right click the mosaic dataset and select Add Rasters.
- In the Geoprocessing pane, make sure the Raster Type is set to Raster Dataset. Under Input Data, click the Browse button and select the folder that contains the data you wish to use. Click Run to generate rasters.
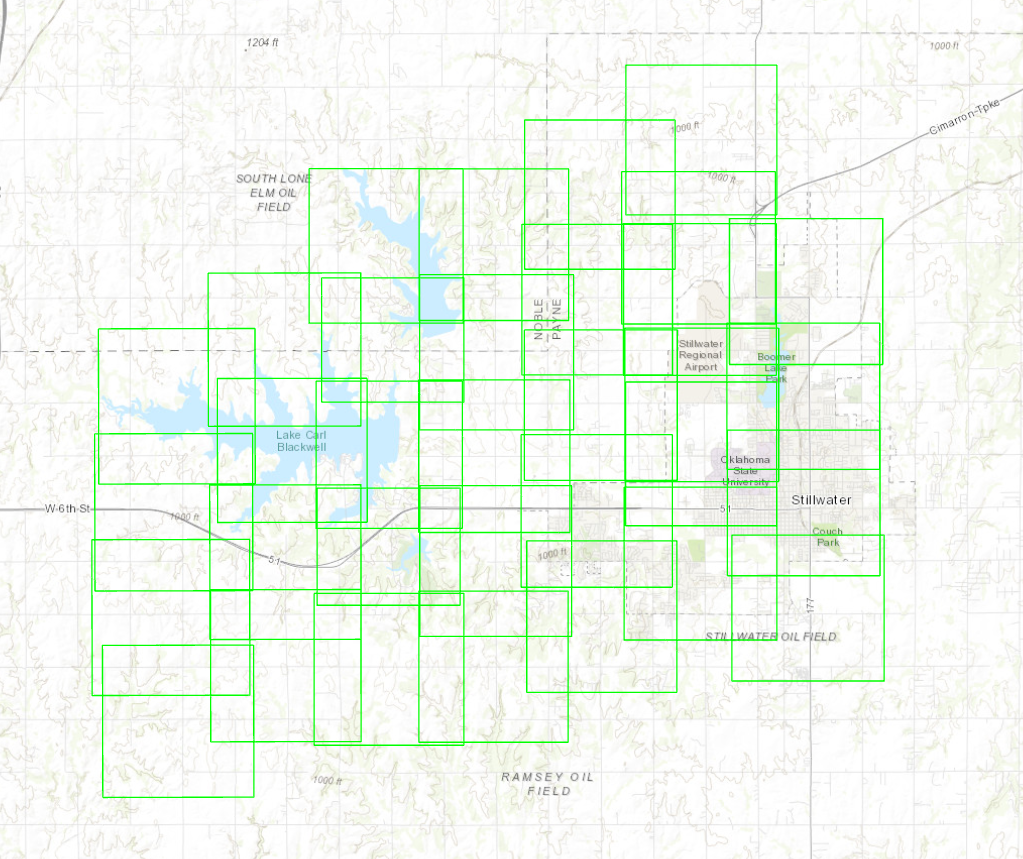
- The rasters should generate, but you may have to zoom in to see the images that are being used.
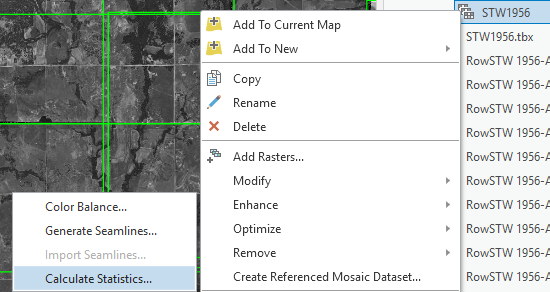
- In the Catalog pane, right click the mosaic dataset, point to Enhance and select Calculate Statistics.
- Accept the defaults and click Run.
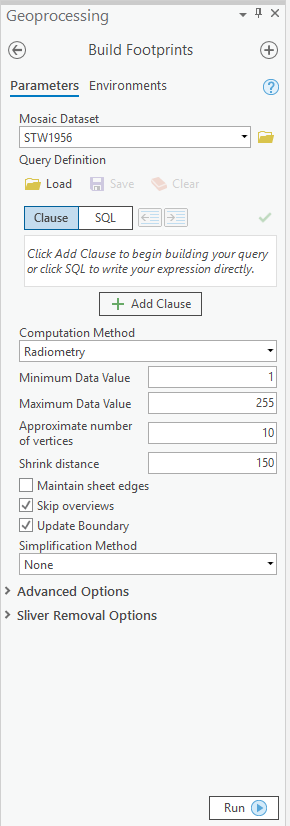
- Right click the mosaic dataset, point to Modify and select Build Footprints
-
Make sure the Computation Method is set to Radiometry.
-
Set the Minimum Data Value and Maximum Data Value as desired. The Minimum Data Value is the lowest valid pixel value and the Maximum Data Value is the highest valid pixel valuen. All values not included in this range will be removed.
-
Set the Approximate Number of Vertices as desired. This indicates the number of vertices the footpring polygon will include.
-
Set the Shrink Distance as desired. This is the distance value that the polygon will be reduced in size. Think of it as “trimming the edges” of the image.
-
The Skip Overviews and Update Boundary boxes are checked.
-
Click Run.
- Save the project.
Color Balancing
Sometimes, if images come from different sources, they may appear lighter or darker than their neighboring images. This can be rectified to some extent by color balancing.
- To begin color balancing, add the JPG or TIF of the file that has a good distribution of light and dark colors to the map. This file will later be removed.
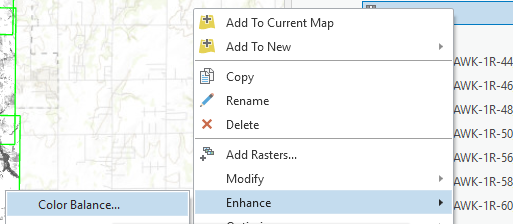
- Right click the mosaic dataset in the Catalog pane, hover over Enhance and select Color Balance.
- Set the Balance Method to Histogram and the Target Raster to the JPG or TIF file you just added. Leave Block Field empty and click Run.
-
Under the Appearance tab of the toolbar, you can alter the layer’s contrast, brightness and gamma until the picture is displayed as desired.
-
Save the project.
Seamlines
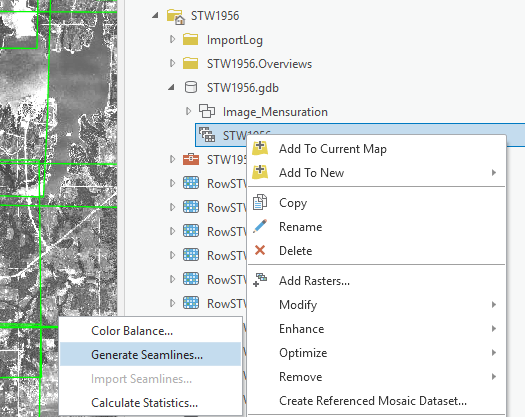
- To generate seamlines, right click the mosaic in the Catalog pane, hover over Enhance and select *Generate Seamlines.
-
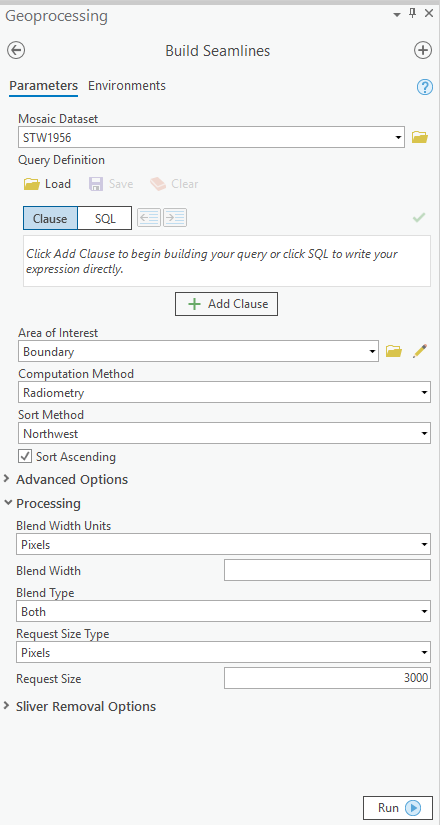
Set the Area of Interest to Boundary.
-
Under Processing, the Request Size can be altered to make the seamlines more or less precise.
-
Click Run.
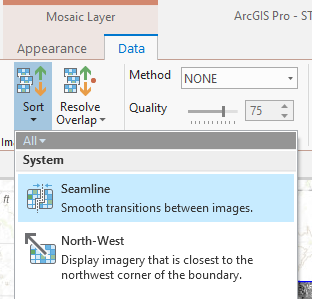
- On the toolbar, under the Data tab, click the down arrow under Sort and select Seamline.
- Save the project.
Tile Generation
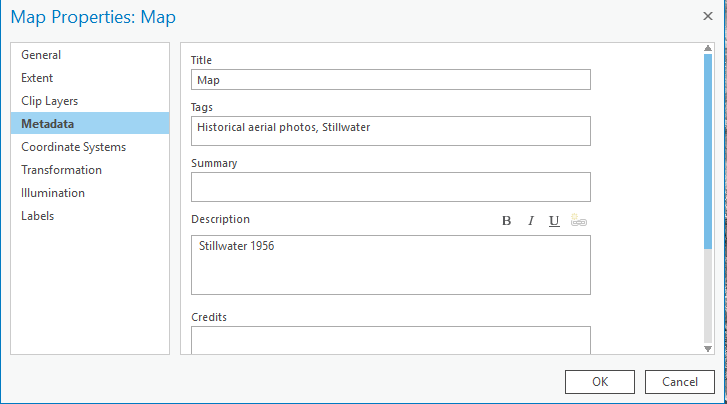
- Before tiles can be generated, a description and tags must be added to the map. To do this, double click Map in the Contents pane, click Metadata and add tags and a description. Click OK.
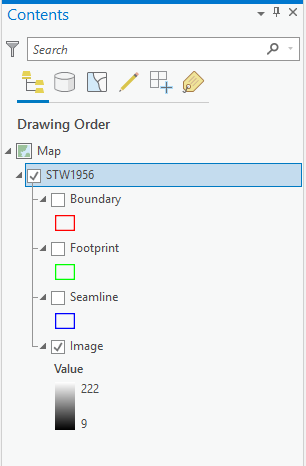
- Remove all other layers from the Contents pane except for the mosaic layer. Even the basemap must be removed.
-
Under the Analysis tab of the toolbar, select Tools. This will open the Geoprocessing pane.
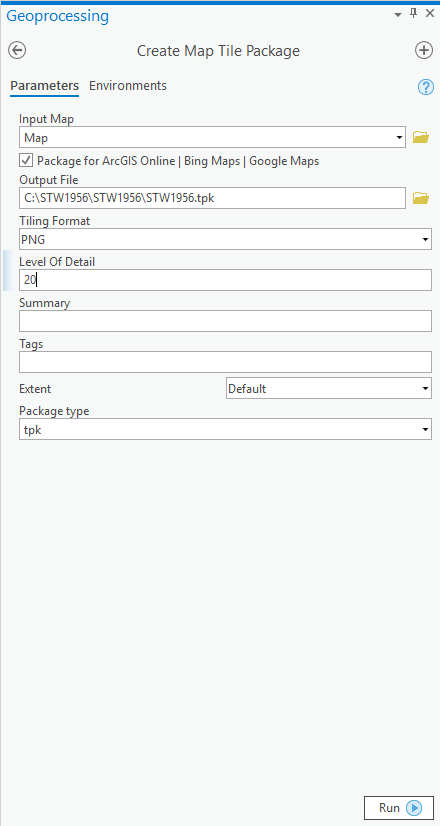
- Search Create Map Tile Package in the Geoprocessing pane.
- Choose Map as the Input Map, adjust the other settings as desired and click Run.
Note: Tile generation may take some time. Be patient.
- Save the project and exit ArcGIS Pro.
Publishing
If you would like to publish the tiles, this can be accomplished in just a few steps.
- Remove the mosaic dataset from the Contents pane.
- In the Catalog pane, locate the tile package and add it to the project.
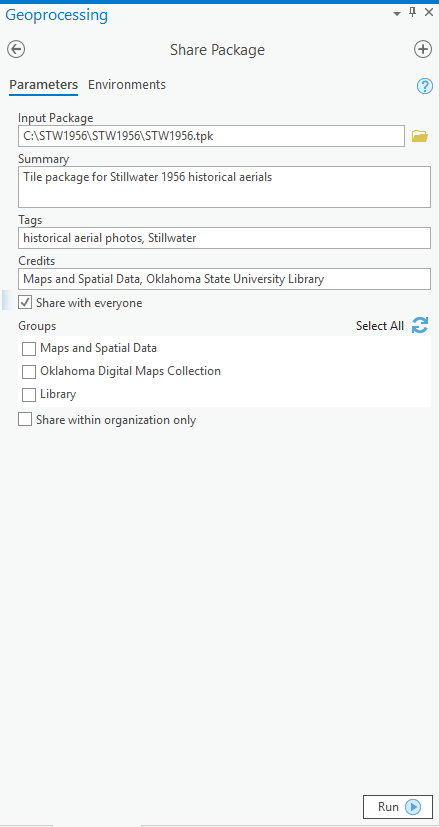
- Open the Geoprocessing pane and search Share Package.
- Add information as desired and click Run.
- Open a web browser and log on to your ArcGIS accouunt.
- Locate the tile package in your files and open it.
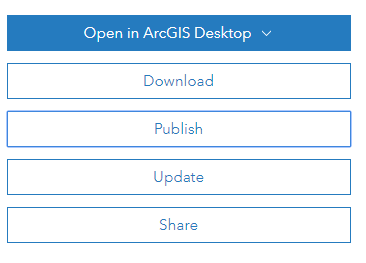
- Click Publish in the right hand corner.
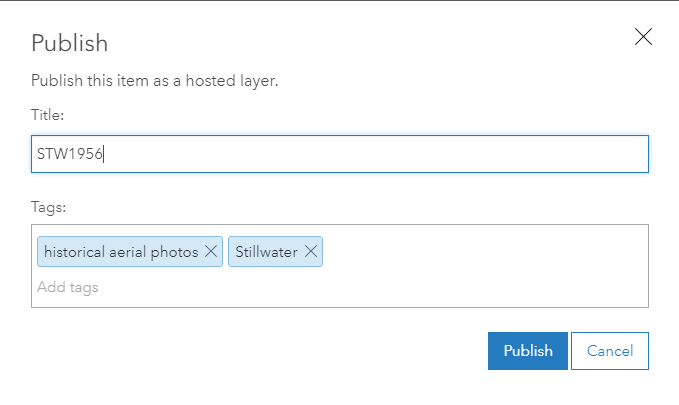
- Update information in the pop up as desired and click Publish.
Conclusion
Mosaic datasets make working with large quantities of files much easier and more organized.
